Filling of electrical, gas & plumbing conduits over masonry & concrete walls usually present a diffcult challenge. Filling these conduits with conventional cement & sand mortar usually results in a variety of problems such as cracks & hollow sound of plaster over the wall surfaces. To tackle this issue, it is essential to use the right products with
the right methodology. This is especially true for renovation works where timelines are challenging & its always better to have the right approach without trial & error on site.
It is recommended to cut the masonry walls for conduits using suitable mechanical means like a grinding machine & mechanical chipping and cutting machines. If an existing plastered surface is being cut over, it is recommended to mark the cutting surface. Use a grinder to cut the opening & then removing the Centre part.
Although it is not recommended to cut any structural concrete masses, if there is a requirement to cut the concrete mass for conduiting, it is essential to check & make sure that no reinforcement steel is cut to make room for the conduits. In case there is a need to cut the steel of the concrete member, please consult a structural engineer.

Once the area under consideration is cut, the conduit pipes are passed through. It is also recommended in case of electrical conduiting, the wires should also be passed through the pipes before the conduit has been filled up (if possible).

Proper product preparation methodology for the mixing of Crack Heal 920 2K2 is to be followed (Please refer to the product preparation methodology of the product from its technical datasheet).
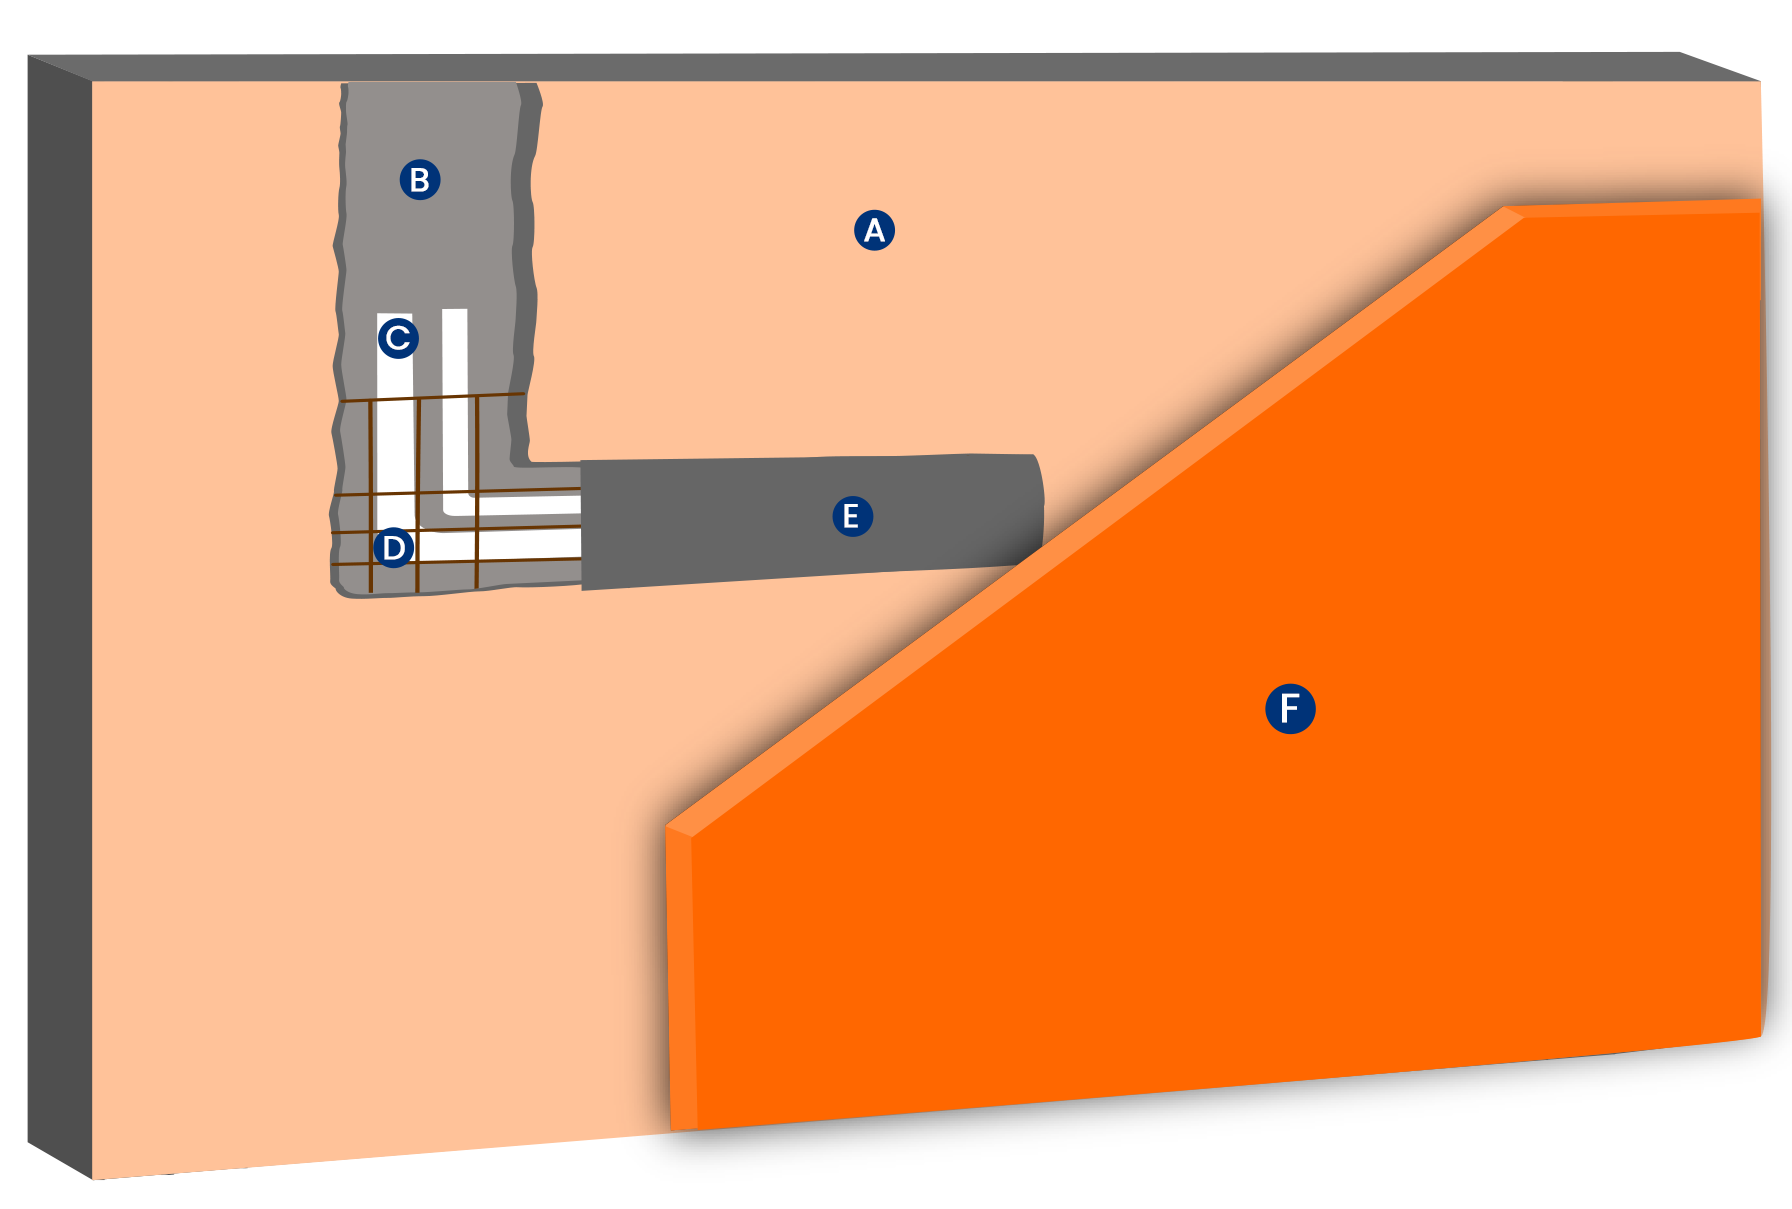
It is essential to make sure that the mortar of Crack Heal 910 2K is placed in all the smaller & cramped areas of the conduit space all together. Once a proper filling of Crack Heal 910 2K is done within the conduit, it is recommended to apply a metal mesh over the conduit surface. The metal mesh should overlap at least 6 inches either side of the masonry, plaster, or concrete surface where the conduit is being laid.

Once the metal mesh has been applied, Plastering can be done over the surface of Crack Heal 910. The Recommended plaster in this case is Ressi Plasto Rend 120. If this product cannot be applied, it is recommended to use Ressi SBR 5850 along with the cement and sand mortar to avoid cracking of the plaster over the surface. The recommended dosage of Ressi SBR 5850 is 1 KG per 50 KG Bag of cement in this case.


A: Wall (Masonry or Plastered)
B: Cutting open masonry surface
C: Conduit Pipes
D: Metal Mesh
E: Crack Heal 910 2K
E: Finishing the wall (Plaster or paint)
Filling Of Utility Conduits For Renovation Works (Walls)