
A leaking water tank should be repaired at the source, not merely covered with a temporary surface patch. The correct cement water tank leakage solution depends on whether water is entering through cracks, construction joints, corners, or porous concrete and whether the tank stores domestic drinking water.
Cement tank vs. concrete tank: Are they the same?
In common use, a “cement tank” and a “concrete tank” refer to the same type of water storage structure. Cement is the binding material, while concrete is made from cement, sand, aggregate and water; both search terms are therefore relevant when repairing a leaking tank.
An overhead water tank, underground tank, or water-retaining chamber may leak even when its surface appears solid. Water can travel through very fine capillaries in concrete, so the visible damp patch is not always the exact point where the water first entered.
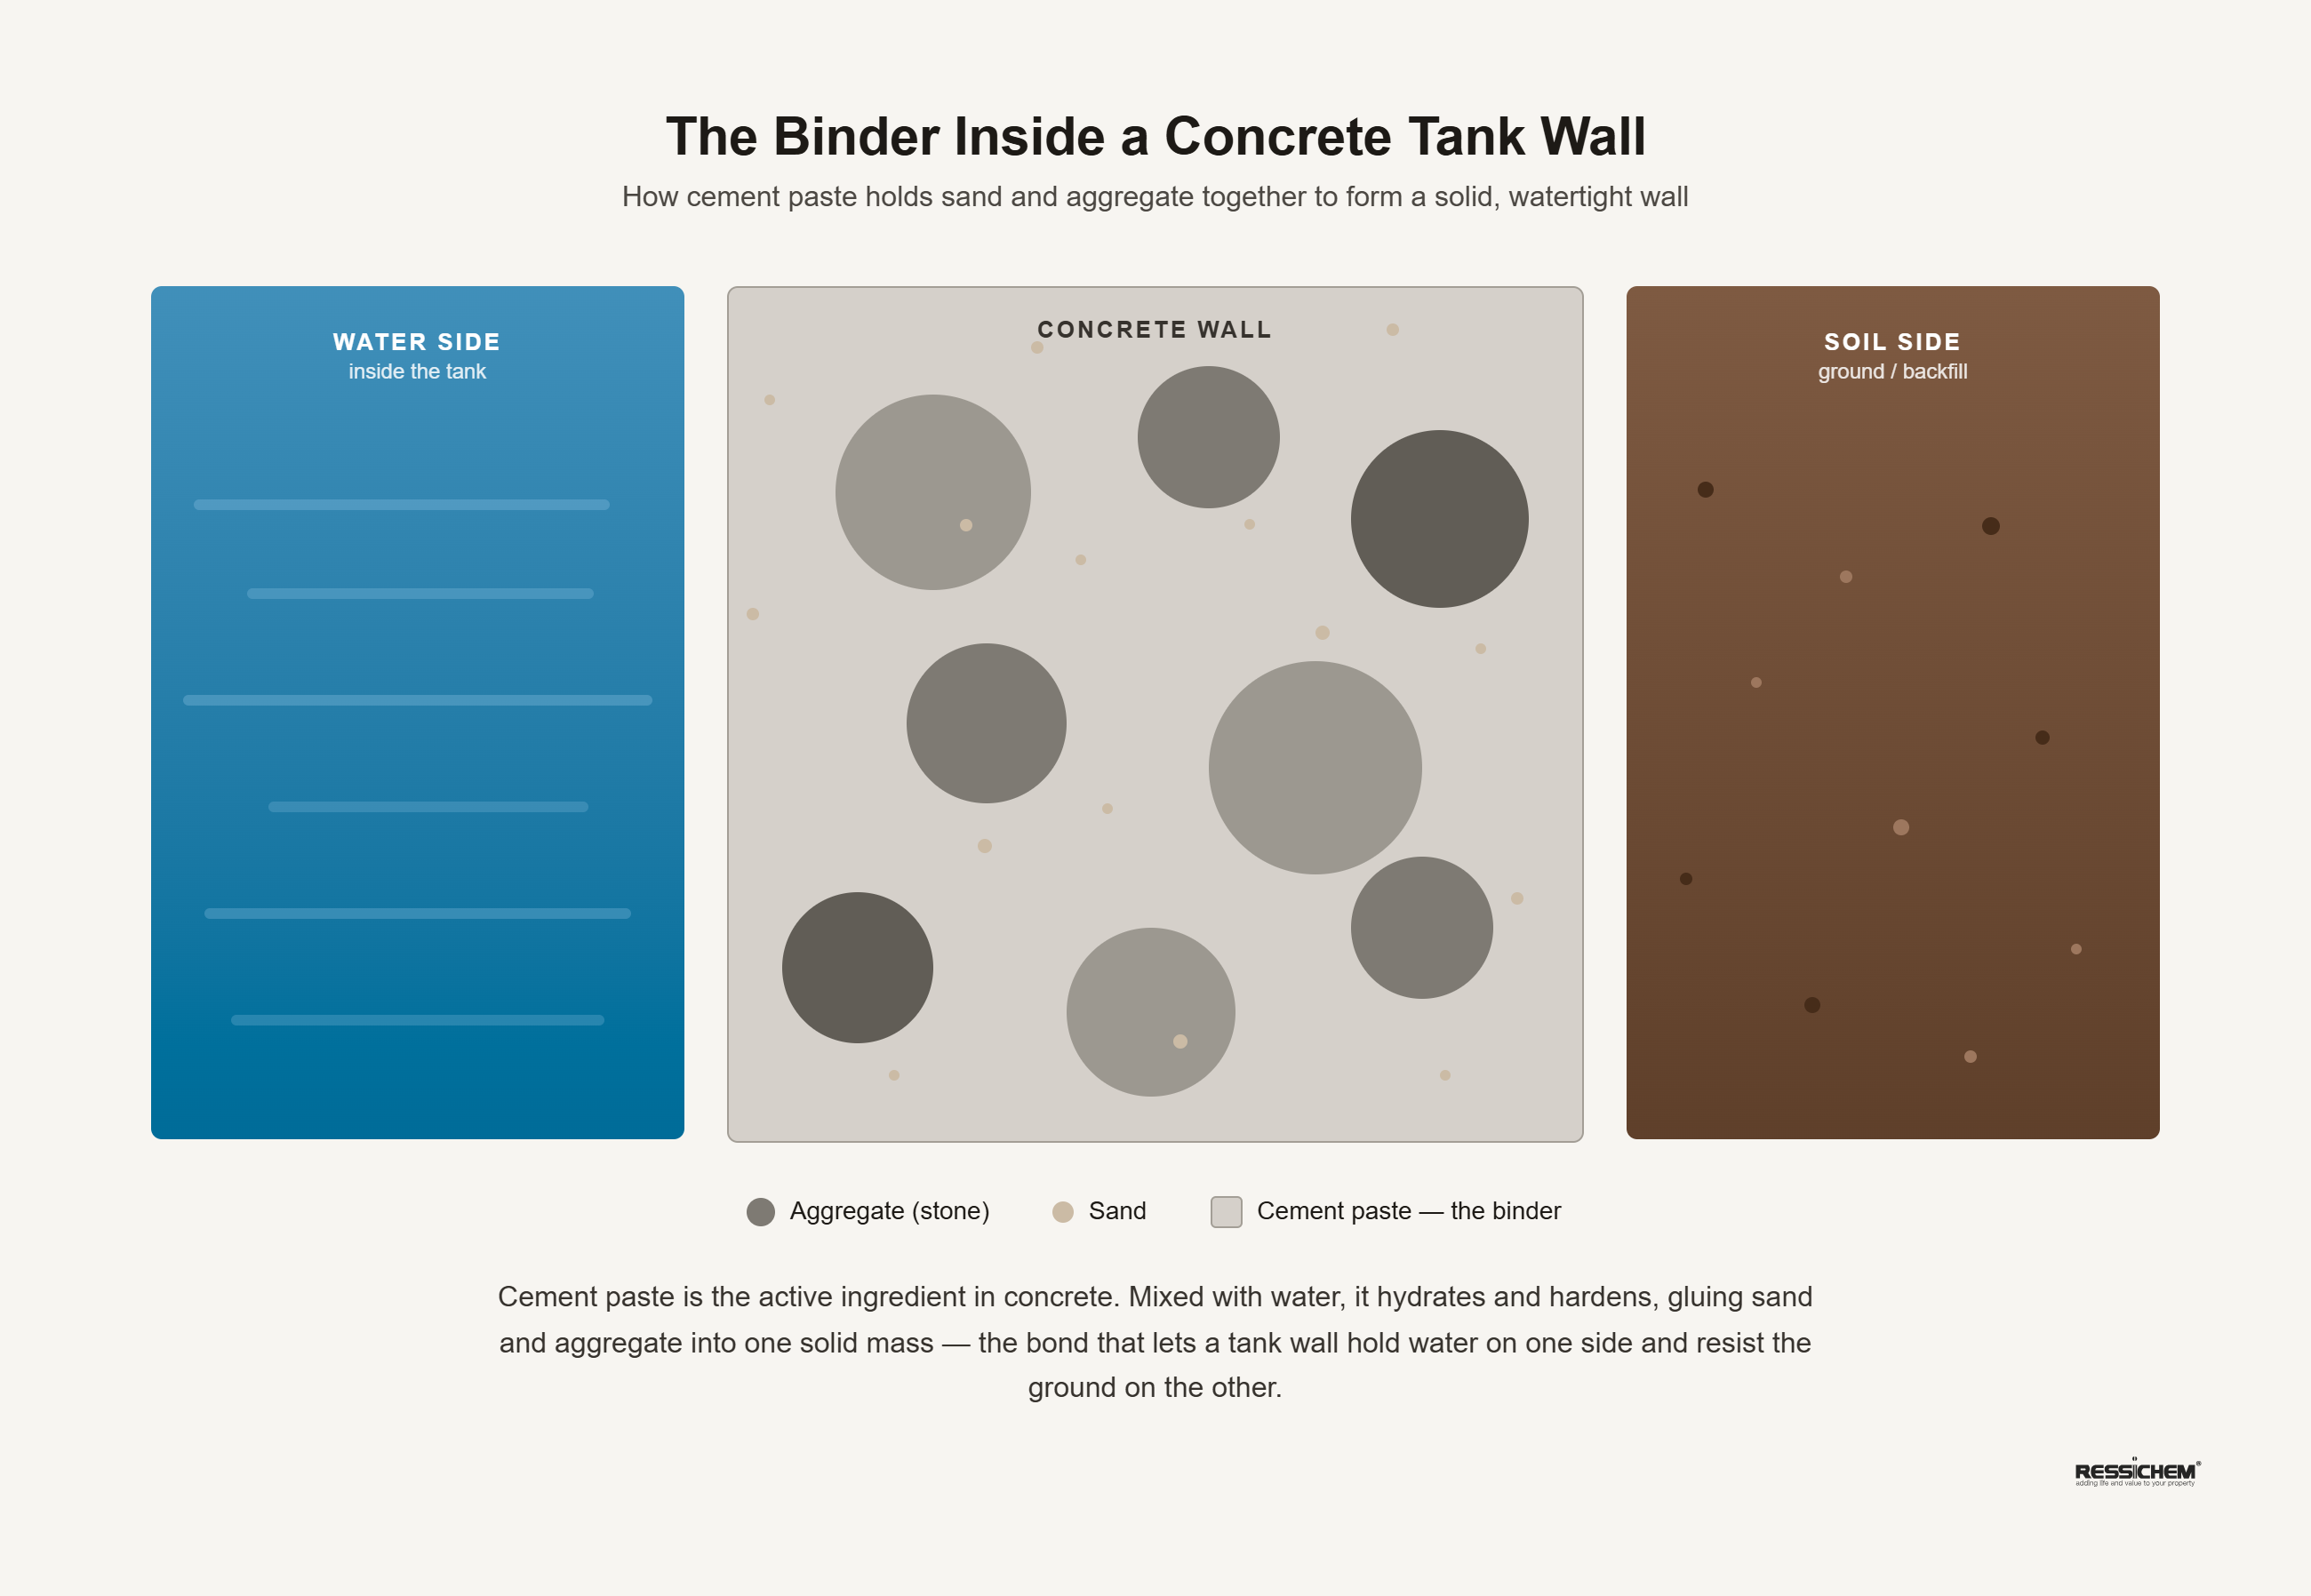
Common causes of leakage in cement and concrete water tanks
Cement and concrete water tanks usually leak because water pressure finds a route through cracks, joints, porous areas or poorly detailed corners. A durable repair needs to address both the visible leak and the path water is using inside the concrete.
Common causes include:
Hydrostatic pressure: Stored water continuously presses against tank walls and floors. This pressure can force water through weak points, especially in underground tank waterproofing situations.
Structural or shrinkage cracks: Concrete may develop cracks as it cures, settles, expands or contracts. Fine shrinkage cracks may be difficult to see but can still allow seepage.
Weak construction joints: Joints between wall and floor pours, or between separate concrete pours, are common leakage points.
Poor original waterproofing: A tank may not have received suitable waterproofing during construction, or an old coating may have failed over time.
Untreated sharp corners: Internal 90-degree wall-to-floor and wall-to-wall corners can concentrate stress and allow water to penetrate.
Weather and soil conditions: External moisture, soil pressure and movement around underground tanks can worsen existing weaknesses and create negative-side water pressure.
A tank repair should not assume every damp area is only a surface problem. If the concrete itself is porous or has minor cracking, a waterproofing system that works within the concrete structure can be more suitable than a film-forming patch alone.
How to identify the source of a water tank leak
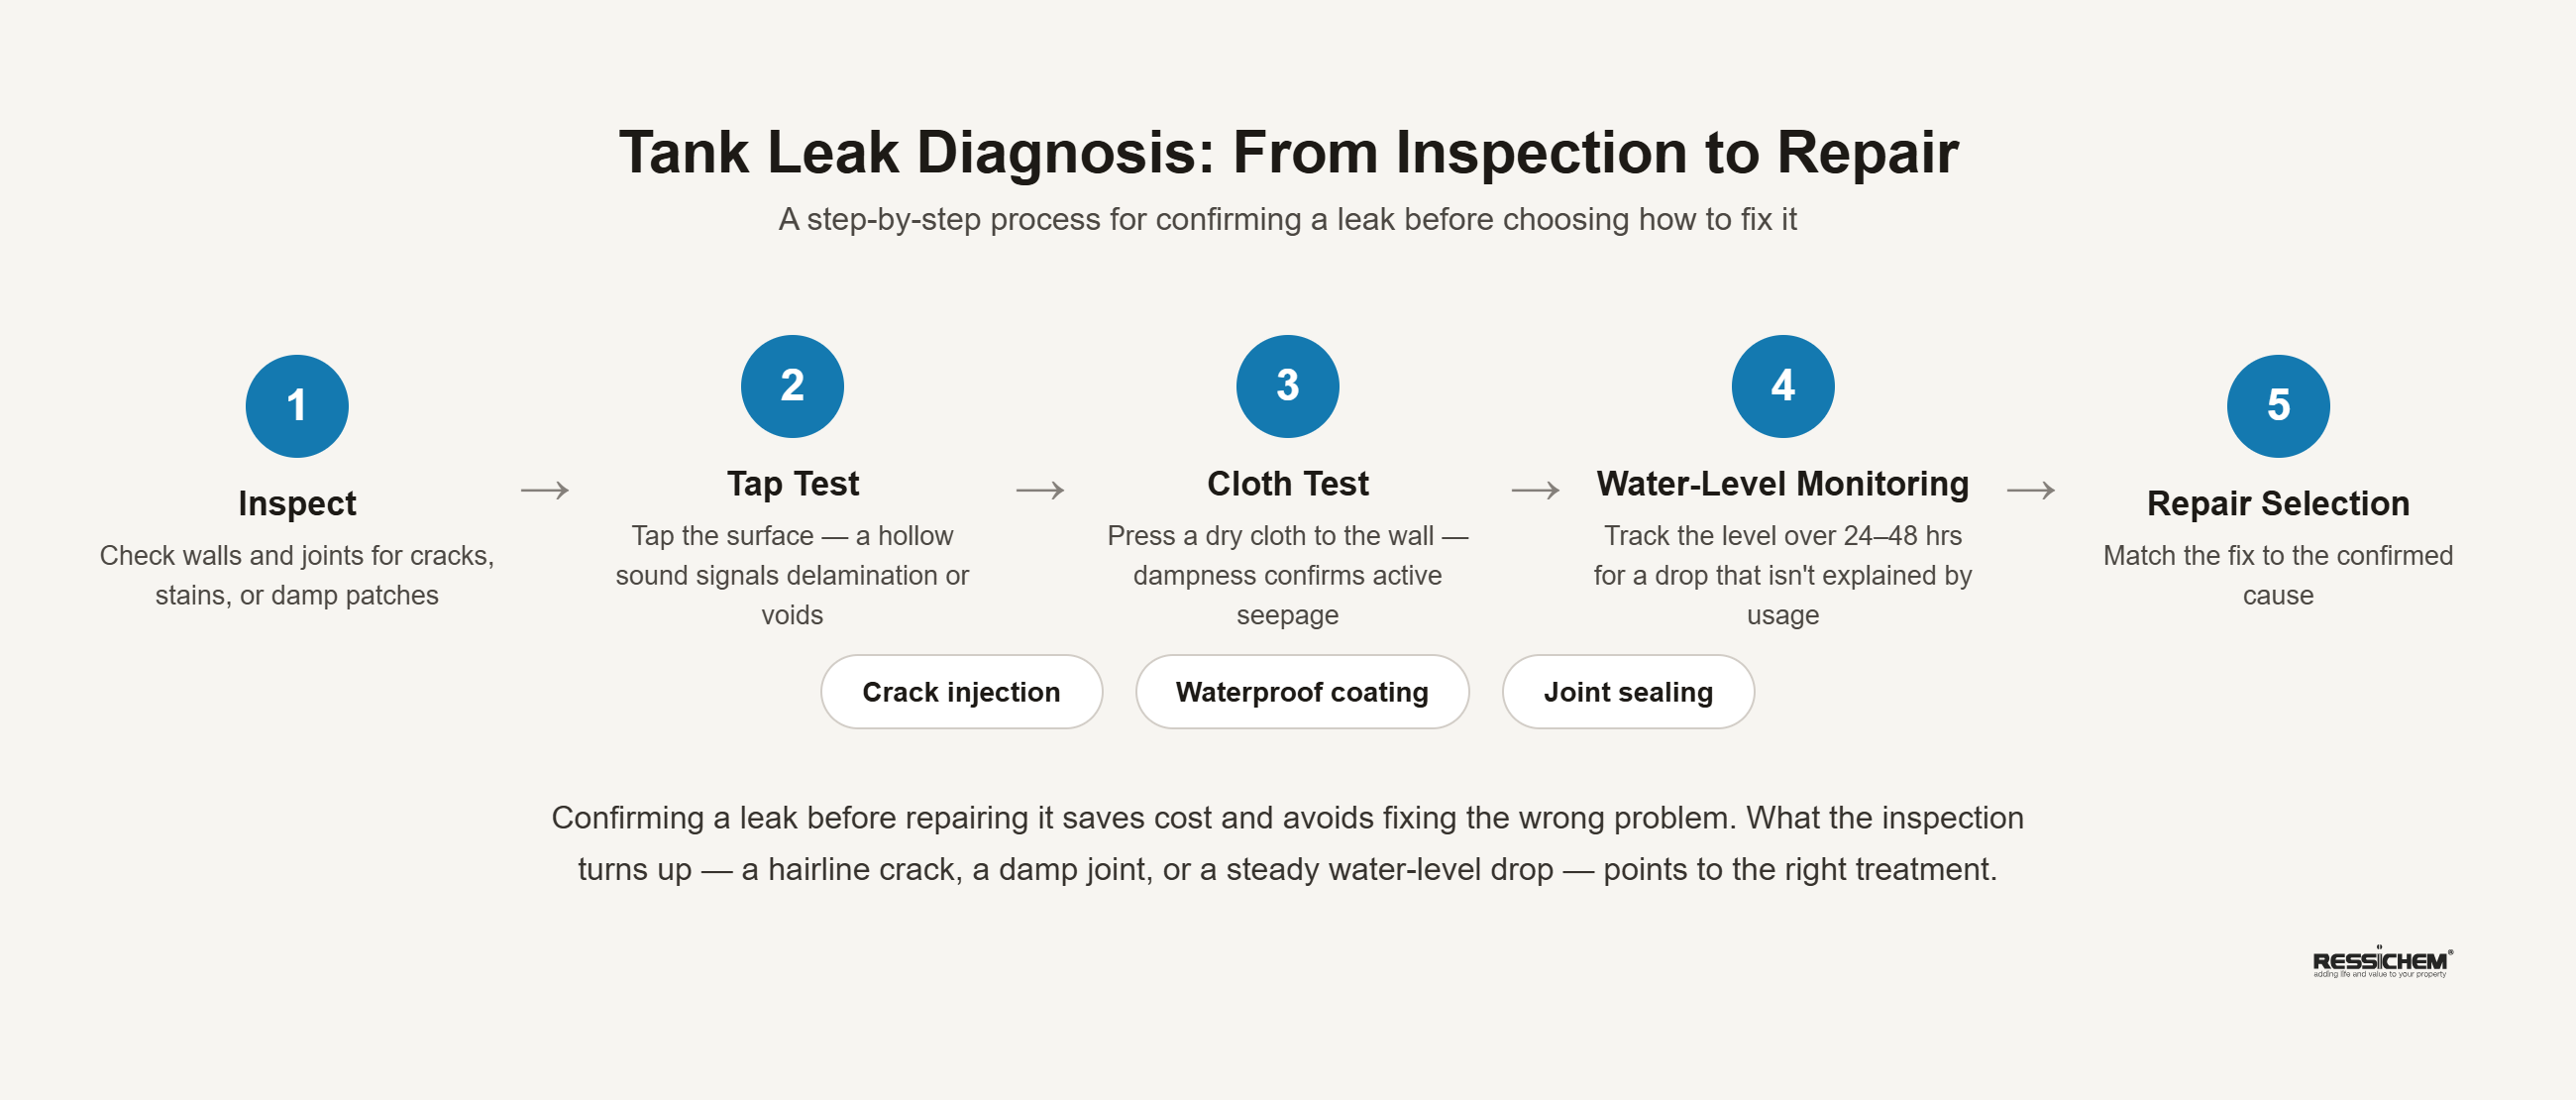
The source of a water tank leak can often be identified by inspecting damp areas, joints, corners and changes in water level. A simple inspection before repair helps prevent applying material to the wrong area.
Start by emptying the tank where practical and allowing accessible surfaces to dry. Look for white deposits, peeling plaster, dark damp patches, hairline cracks, rusting reinforcement signs, and moisture around the wall-floor joint.
Inspect joints and internal corners first
Wall-floor joints and sharp internal corners are among the most common places for concrete water tank leakage. Check these areas closely because a leak can travel along a joint before becoming visible elsewhere.
Professional repair work often includes chamfer detailing: creating a beveled treatment at an internal 90-degree joint rather than leaving a sharp corner. This reduces the weak transition at the joint and gives the waterproofing material a more continuous surface.
Use a tap test and dry cloth test
A tap test can help identify hollow or loose plaster, while a dry cloth test can reveal active moisture. Tap suspicious plastered areas gently; a hollow sound may indicate debonded material that should be removed before repair.
For the dry cloth test, press a clean dry cloth against a suspected area after the surface has been wiped. If it quickly becomes damp again, water may still be moving through that location or from a nearby path within the concrete.
Monitor the water level
A controlled water-level check can help confirm whether the tank is losing water. Mark the water level, avoid normal water use during the test period where possible, and compare the level after a suitable interval.
Water level loss alone does not identify the exact leakage point, because evaporation and plumbing issues can also affect results. Combine this check with visual inspection of joints, cracks, corners and exterior dampness.
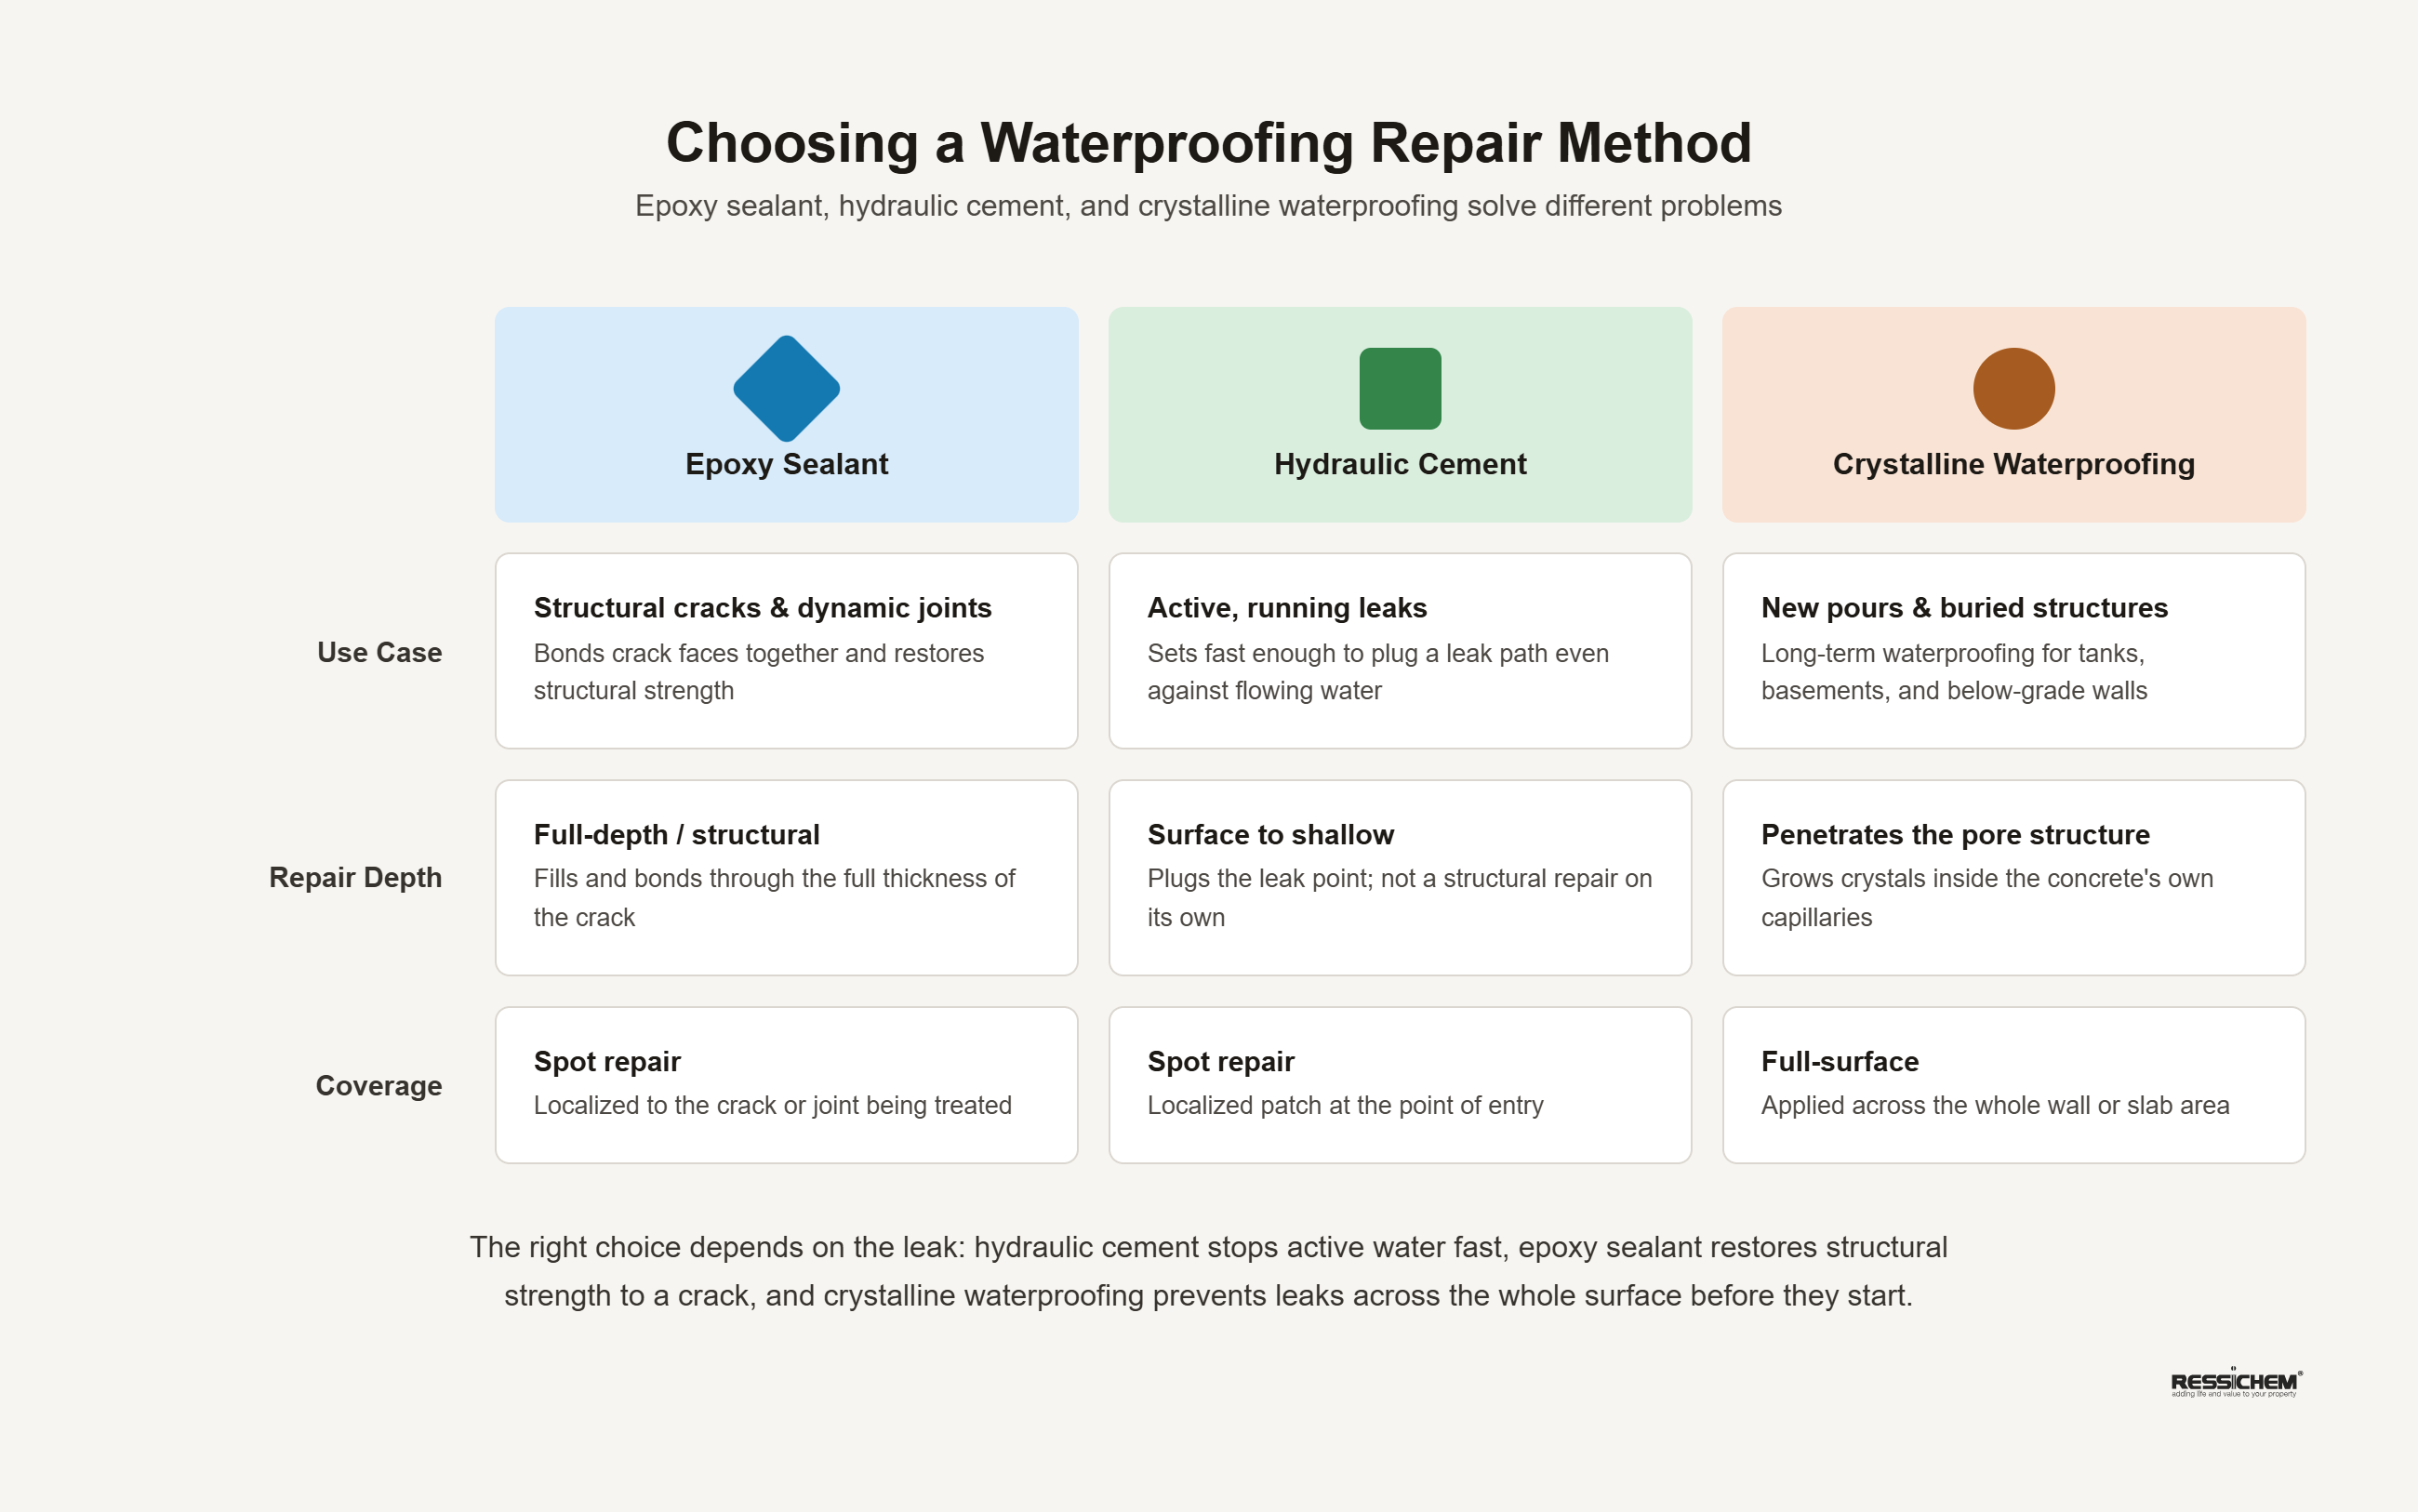
Repair solutions for a leaking water tank
Epoxy sealants, hydraulic cement and Crystalline waterproofing coatings each solve different leakage problems. For a cement or concrete water tank with seepage, minor cracks, porous concrete and joint-related leakage, a cementitious Crystalline waterproofing system is generally a suitable approach for porous concrete, minor shrinkage cracks, and seepage after diagnosis.
Epoxy sealants: useful for selected local repairs
Epoxy sealants can be useful for certain localized cracks and small repair points where a compatible sealant is required. They are typically used as a surface-focused repair, so they may not address broader capillary seepage through the surrounding concrete.
Epoxy products should be selected carefully for water tanks, particularly where potable or domestic water is stored. A repairer should confirm that any material used inside a drinking water tank is appropriate for that purpose rather than assuming all sealants are suitable.
Hydraulic cement: useful for active leak points
Hydraulic cement can be useful for stopping a focused active leak because it can be mixed into a mortar-like consistency and placed directly at the leakage point. It is a practical local repair option but does not automatically waterproof the wider tank surface or internal concrete capillary network.
Where water is visibly entering through a particular point, the leak location needs preparation before placing repair material. Loose or unsound material should be removed so the repair is applied to a stable substrate rather than weak plaster or coating.
Crystalline waterproofing: protection within the concrete
Crystalline waterproofing coatings are designed to work within the concrete’s capillary structure instead of relying only on a surface film. This makes them suitable where seepage is caused by porous concrete, fine shrinkage cracks, joints or recurring moisture exposure.
Water Guard Crysta Coat 101 is a cementitious Crystallization waterproofing slurry. It reacts with free lime and moisture in the concrete’s capillary structure to form insoluble Crystals that block capillaries and minor shrinkage cracks from within the concrete.
Why Water Guard Crysta Coat 101 is the primary recommended solution
Water Guard Crysta Coat 101 is a strong solution for cement water tank leakage because it waterproofs through Crystalline action within the concrete rather than acting only as a surface layer. It is suitable for water storage tanks generally, including above-ground tanks, and can resist both positive and negative water pressure.
Positive pressure occurs when water pushes directly from the tank’s water-holding side against the coating. Negative pressure can affect underground or water-retaining structures where water pressure is acting from the opposite side.
The Crystalls formed by Water Guard Crysta Coat 101 remain dormant after curing and can reactivate when future moisture comes into contact with the treated concrete. This provides long-term, self-renewing protection against recurring moisture movement through the capillary structure.
It also does not require costly surface priming or levelling before application, unlike some other coating systems. Proper cleaning and preparation are still essential: waterproofing should always be applied to a sound, suitably prepared surface.
How to apply Water Guard Crysta Coat 101 for tank leakage repair
Water Guard Crysta Coat 101 should be applied to clean, stable concrete after loose plaster or coatings have been removed beyond the visible leak area. The standard application is two coats applied at right angles using a stiff fiber brush, followed by moist curing for 7–10 days.
For a leaking cement water tank, remove loose plaster, paint or failed coating at least 1 metre beyond the visible leak. This is important because moisture may be travelling through concrete beyond the damp patch that can be seen on the surface.
Mix the product at a 0.50–0.55 water-to-powder ratio to create the required slurry consistency. Apply the first coat evenly with a stiff fiber brush, then apply the second coat at right angles after the first is ready for the next coat.
For active leaks, Water Guard Crysta Coat 101 can be mixed to a mortar consistency or combined with a suitable plugging compound at a 1:1 ratio directly at the leak point. This local treatment should then be supported with coating across the prepared surrounding area rather than leaving it as an isolated patch.
Keep the treated surface moist for 7–10 days to support proper curing. For additional protection, apply two coats of Water Guard 491 over cured Water Guard Crysta Coat 101.
Is waterproofing chemical safe for drinking water tanks?
Chemical choice matters because materials used inside domestic water storage tanks may come into contact with drinking water. Bitumen-based products are oil-based and are unsuitable for drinking water tanks, they should not be used in drinking water tanks; while Water Guard Crysta Coat 101 is confirmed suitable for contact with potable water.
A non-toxic water tank sealant or waterproofing material should be selected specifically for potable-water contact rather than chosen only for its ability to stop water. This is especially important for household overhead tanks and underground tanks that supply kitchen, bathroom and general domestic water.
Water Guard Crysta Coat 101 is confirmed safe for drinking water storage tanks when used for this application. This makes it a suitable choice where homeowners need both waterproofing performance and confidence that the material is appropriate for domestic water storage.
DIY repair vs. when to call a professional
DIY repair can be suitable for small, accessible seepage areas where the tank structure is sound and the homeowner can prepare and cure the surface correctly. A professional should assess major cracks, repeated leakage, structural movement, inaccessible tanks or signs of damage beyond surface waterproofing.
A basic DIY job may include removing loose material, preparing a small local leak area, treating a sound tank surface and following the product’s mixing and curing requirements. The most common DIY failure is applying a product over damp, loose, painted or unstable material without fixing the underlying weakness.
Call a waterproofing professional when a crack is widening, reinforcement is exposed, tank walls are moving, leaks return after previous repairs, or the tank cannot safely be emptied and accessed. Ressichem provides onsite technical support for construction and industrial waterproofing problems, backed by qualified engineers and chemists through its in-house quality testing capability.
Cost factors for water tank leakage repair
The cost of repairing a leaking water tank depends on the size of the tank, the number and severity of leaks, accessibility and whether structural damage is present. A small accessible seepage repair is different from repairing an underground tank with multiple joints, damaged plaster or underlying cracks.
The repair scope can increase when old coatings need removal, corners require chamfer detailing, active leaks need plugging, or the tank needs a larger waterproofing area. The right approach is to inspect the actual condition first, then select a repair system that covers both the immediate leak and the wider risk of seepage.
Prevention and maintenance for cement water tanks
Preventing tank leakage starts with waterproofing sound concrete before seepage becomes visible and maintaining joints, corners and surface condition over time. New construction should treat waterproofing as part of the tank build process, not only as a later repair.
Inspect tank corners, construction joints and internal surfaces periodically for damp patches, cracks, loose plaster or coating failure. Deal with small defects early, because continuous hydrostatic pressure can turn a minor weak point into more widespread seepage.
For new tank construction, Water Guard Crysta Coat 101 can also be applied to freshly laid green concrete through the dry-shake method. This makes it a build-stage waterproofing option for new concrete tanks as well as a repair system for existing tanks.
Avoid leaving internal corners as untreated sharp 90-degree transitions. Chamfer detailing at these joints is a professional-grade preventive measure that helps reduce the chance of corner leakage.
Tanki ki leakage ka hal / Pani ki tanki leak ho rahi hai, kya karen?
If your water tank is leaking, first identify whether the water is coming through a crack, a wall-floor joint, a corner or porous concrete. Remove loose material around the affected area, repair any active leak point, then waterproof the prepared tank surface with a potable-water-suitable Crystalline system such as Water Guard Crysta Coat 101.
Do not simply apply an unknown sealant over a damp patch, especially inside a domestic drinking water tank. The material must suit the type of leak and be safe for contact with stored water.
Frequently asked questions
How to stop cement water tank leakage?
Stop cement water tank leakage by locating the crack, joint, corner or porous area causing seepage, removing loose material, repairing active leak points and applying a suitable waterproofing system. Water Guard Crysta Coat 101 is a cementitious Crystalline coating that blocks concrete capillaries and minor shrinkage cracks from within, making it suitable for tank seepage repair.
For active leak points, the product can be mixed to mortar consistency or combined with a plugging compound at a 1:1 ratio at the leak point. Apply two brush coats at right angles across the prepared area and keep the surface moist for 7–10 days.
How can I fix leaks in my concrete water tank?
Fix leaks in a concrete water tank by inspecting cracks, construction joints and internal corners, then removing loose plaster or failed coatings at least 1 metre beyond the visible leak. Treat active leaks locally and apply Water Guard Crysta Coat 101 in two cross-directional coats to waterproof the prepared concrete surface.
The repair should include chamfer detailing at internal 90-degree joints where required, because sharp corners are common weak points. If the crack is structural, widening or linked to movement, arrange a professional assessment before waterproofing.
What is the best sealant for a leaking water tank?
The best product for a leaking water tank depends on the leak type, but a Crystallline waterproofing coating is often more suitable than a simple surface sealant for seepage through concrete. Water Guard Crysta Coat 101 forms Crystals inside concrete capillaries and minor shrinkage cracks, so it addresses moisture pathways within the substrate.
For a tank that stores domestic drinking water, the product must also be suitable for potable-water contact. Water Guard Crysta Coat 101 is confirmed suitable for contact with potable water, whereas oil-based bitumen products are unsuitable for drinking water tanks.
How to stop a water tank from leaking?
Stop a water tank from leaking by finding the true water-entry path, repairing active leak points and waterproofing the affected concrete rather than covering only the visible damp patch. For concrete tanks, Water Guard Crysta Coat 101 provides Crystalline waterproofing that works against positive and negative water pressure.
Prepare the surface properly by removing loose material and applying two coats at right angles with a stiff fiber brush. Maintain moist curing for 7–10 days, and use two coats of Water Guard 491 over cured Crystal Coat 101 where extra protection is required.
For a tank repair system suitable for domestic water storage, explore Ressichem Water Guard Crysta Coat 101.